Running containerized android tests in GCP using Pulumi and Selenoid
Leveraging Pulumi’s IaC feature to run Android test automation

In the previous blog we looked at running web automation tests using selenoid in Docker and Kubernetes. This time we are going to look at running containerized android tests in GCP using Pulumi and Selenoid.
Pulumi is a modern Infrastructure as Code platform that allows you to use familiar programming languages and tools to build, deploy, and manage cloud infrastructure. Selenoid is a lightning fast Selenium protocol implementation running on browsers and android emulator in Docker containers.
To get started with Pulumi and GCP, please refer to this article. It includes installation and environment setup.

Totally there are 3 parts to this article,
-
Environment setup in GCP,
-
Running Selenoid containers, and
-
Containerizing Android tests and executing it
Environment setup in GCP
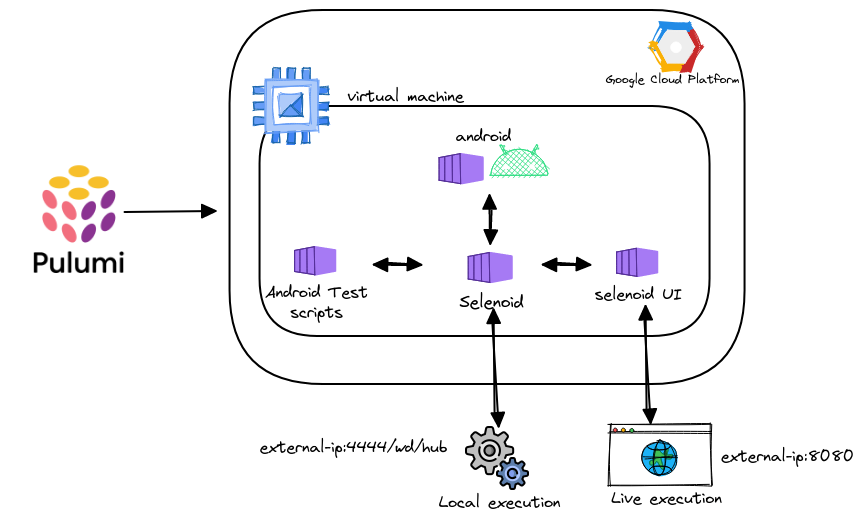
In order to run selenoid android containers we need a Linux server with nested virtualization enabled. So we will use Pulumi to build infrastructure setup in GCP. One thing to keep in mind is that not every machine type in GCP supports nested virtualization; for more info refer to this article.
deploy.sh file contains scripts to install docker and docker compose in the GCP remote instance.
Running Selenoid containers
Pulumi docker provider packaged is used to run the containers in GCP instance.
Containerizing android tests and executing it
To demonstrate I have used Sauce Labs swag app using Java to automate the login process. Containerized the test scripts using docker multi stage build.
Remote address
String APPIUM = "http://selenoid:4444/wd/hub";
The android automation test scripts should point to the above URL. If the test application is also deployed as part of a docker container.
String APPIUM = "http://external-ip:4444/wd/hub";
If you want your setup to be in GCP and run tests from the local machine, all we need is to change the above URL to point to the External IP address.
Specifying capabilities

One thing to notice here is that rather than providing the local path of the APK file, I have specified the URL. Because the local path of the APK does not exist inside the container or else you have to bind mount the APK file. Another approach is to build an image with APK preinstalled.
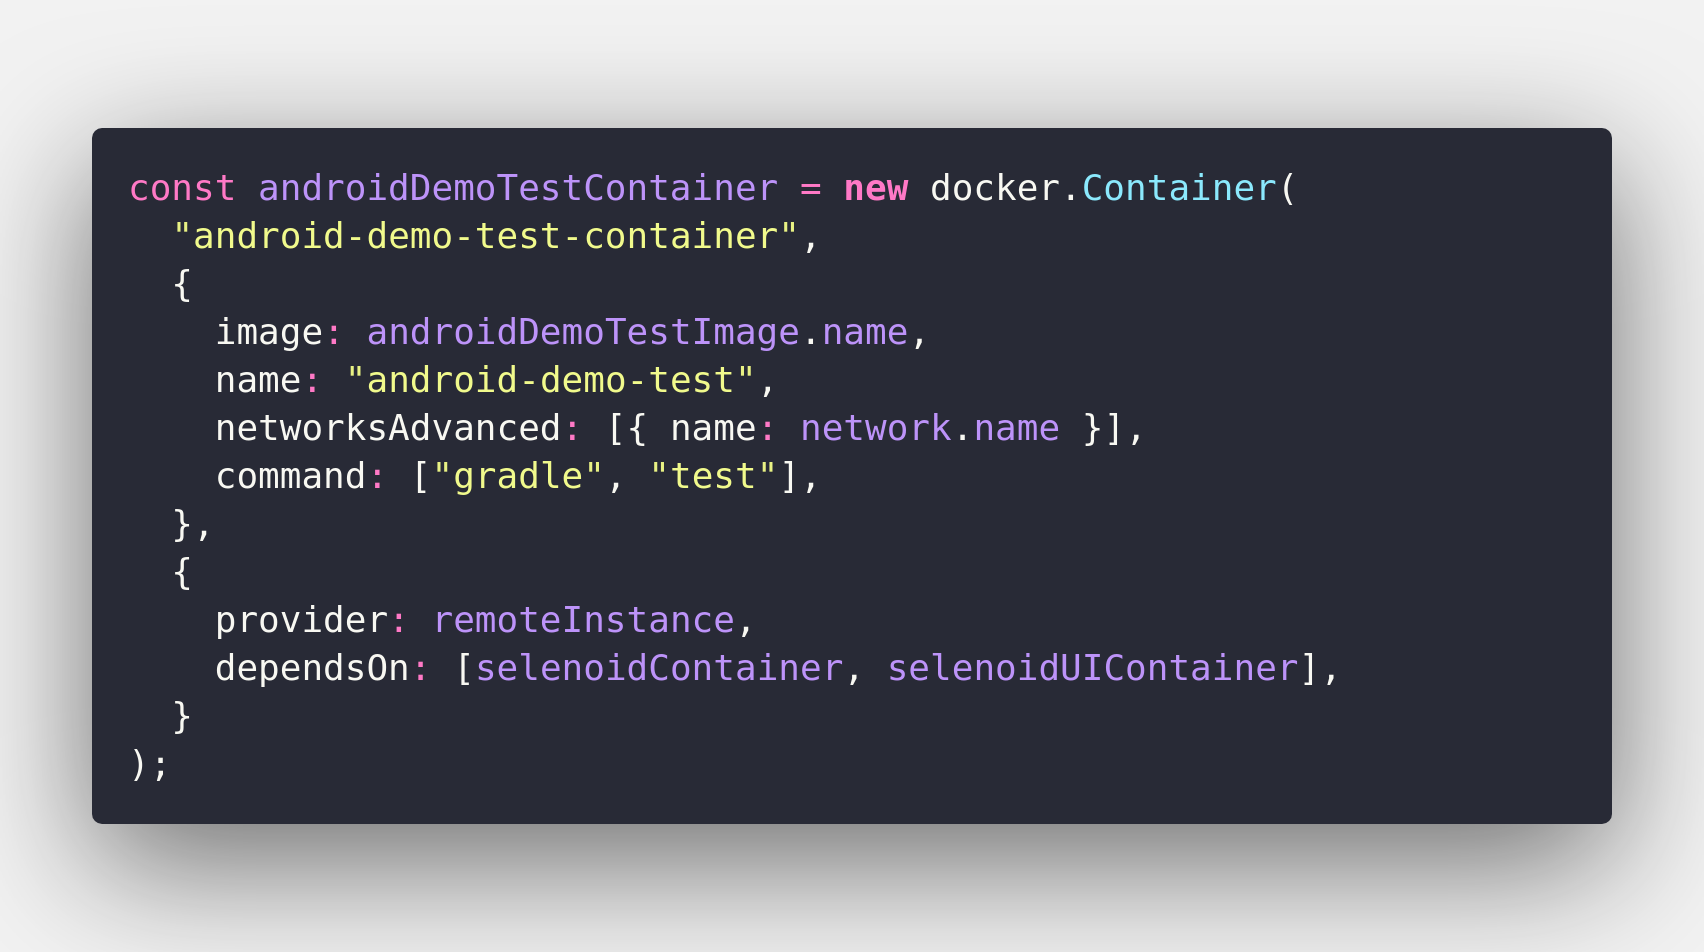
Adding containers to Pulumi docker setup

Finally, the docker execution file of Pulumi will look like this. Since it is a demo application, I have pushed docker image to the public registry; you should consider pushing it to private registry.
Execution
Finally, we have reached to the execution part, once all the setup has been completed. All we need to do is run the below command.
pulumi up
Proceed with “Yes” for pulumi preview updates, and you will have the infrastructure setup in 4 minutes logs. You can connect to http://external-ip:8080/ to see the live execution. The Selenoid UI also provides the option to launch the session manually. Once the tests are completed, you can run the following command
pulumi destroy
The above command will destroy all the resources created as part of Pulumi (including instance, docker container and images, etc.)
The source code of this blog post can be found here.
Originally published on Medium
🌟 🌟 🌟 The source code for this blog post can be found here 🌟🌟🌟
References:
[1] https://www.pulumi.com/blog/
[2] https://aerokube.com/selenoid/latest/
[3] https://github.com/pulumi/examples
[4] https://brunoscheufler.com/blog/2021-09-26-containers-as-code-with-pulumi-and-docker