Getting Started with Crossplane — Part I
Deploying and managing cloud resources in Kubernetes way

In this blog post, we are going to look at how to create an AWS Cloud resource S3 bucket using Crossplane.
What is Crossplane ?
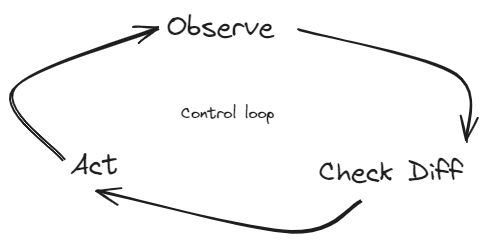
Crossplane.io is an open-source, CNCF project built on the foundation of Kubernetes to orchestrate applications and infrastructures using a declarative approach. It is a framework for creating Control Planes by following principles of the Kubernetes control loop mechanism and using CRDs

How does it work ?
Crossplane transforms the Kubernetes cluster into a control plane to manage the resources in a declarative model. It comes with a set of components: Provider, Composition, Composite Resources, Composite Resource Definitions, and Claims as CRDs, using these components in Crossplane, resources can be managed by directly calling their APIs.

How does it differ from tools like Terraform or Pulumi ?
Language and Syntax:
-
Crossplane — Uses kubernetes YAML manifests file
-
Terraform — Uses a domain-specific language called HCL
-
Pulumi — Uses general-purpose programming languages and YAML
Approach:
Declarative - defining a desired state rather than the steps to reach that desired solution. Imperative — define the steps to execute in order to reach the desired solution.
-
Crossplane — Uses declarative approach
-
Terraform — Uses declarative approach
-
Pulumi — Uses declarative & imperative approach
State Management:
It is a process of keeping track of the current state of the infrastructure resources and how to handle drift.
-
Crossplane — Relies on Kubernetes control loop, allowing it to respond immediately to changes (drift), by continuously reconciling
-
Terraform — Manages the state in a state file. Commands like terraform plan to generate a plan/view the changes and terraform apply to apply changes
-
Pulumi — Manages the state in a state file. Commands likepulumi preview to generate a plan/view the changes andpulumi up to apply changes
Getting Started:
i) Installing Crossplane:
Using the Helm chart, add the Crossplane repo and install the Helm chart in a new namespace.
# Add the repo
helm repo add crossplane-stable https://charts.crossplane.io/stable

# Update local cache
helm repo update

# Install crossplane
helm install crossplane \
--namespace crossplane-system \
--create-namespace crossplane-stable/crossplane
Verify the Crossplane installed components in the cluster by running the following command
➜  ~ k get all -n crossplane-system
NAME                                           READY   STATUS    RESTARTS   AGE
pod/crossplane-b5bd69bfd-wlb2q                 1/1     Running   0          20m
pod/crossplane-rbac-manager-684b78c8c8-c559f   1/1     Running   0          20m

NAME                          TYPE        CLUSTER-IP     EXTERNAL-IP   PORT(S)    AGE
service/crossplane-webhooks   ClusterIP   10.106.50.79   <none>        9443/TCP   20m

NAME                                      READY   UP-TO-DATE   AVAILABLE   AGE
deployment.apps/crossplane                1/1     1            1           20m
deployment.apps/crossplane-rbac-manager   1/1     1            1           20m

NAME                                                 DESIRED   CURRENT   READY   AGE
replicaset.apps/crossplane-b5bd69bfd                 1         1         1       20m
replicaset.apps/crossplane-rbac-manager-684b78c8c8   1         1         1       20m
ii) Configuring AWS providers:
Providers enable Crossplane to provision infrastructure on an external service. In this example, the AWS S3 provider is used. Run the kubernetes apply -f provider.yml to create a Provider object in the k8s cluster.
apiVersion: pkg.crossplane.io/v1
kind: Provider
metadata:
  name: provider-aws-s3
spec:
  package: xpkg.upbound.io/upbound/provider-aws-s3:v1.5.0
To create resources in AWS, need to authenticate to AWS. First, you need to create Secrets from the credentials.
kubectl create secret generic aws-secret \
    -n crossplane-system \
    --from-file=creds=/root/.aws/credentials
And then reference the secrets in ProviderConfig to establish the connection to AWS. Run the kubernetes apply -f provider-config.yml to create a ProviderConfig object in the k8s cluster.
apiVersion: aws.upbound.io/v1beta1
kind: ProviderConfig
metadata:
  name: default
spec:
  credentials:
  source: Secret
  secretRef:
    namespace: crossplane-system
    name: aws-secret
    key: creds
iii) Create S3 bucket
It is time to create an S3 bucket in AWS, execute the commandkubernetes apply -f s3-bucket.yml
apiVersion: s3.aws.upbound.io/v1beta1
kind: Bucket
metadata:
  name: mk-crossplane-test-bucket
  labels:
  testing.upbound.io/example-name: s3
spec:
  forProvider:
  region: us-east-1
  tags:
    env: test
Go to the AWS console, and select the S3 service. And verify the s3 bucket named mk-crossplane-test-bucket is created.
To verify the drift correction process delete the s3 bucket in the AWS console. Wait for some time and observe that the bucket is being re-created.
Originally published on Medium
🌟 🌟 🌟 The source code for this blog post can be found here 🌟🌟🌟
References:
[1] https://docs.crossplane.io/latest/
[3] https://www.youtube.com/playlist?list=PLyicRj904Z99i8U5JaNW5X3AyBvfQz-16